Saturday, July 21, 2012

Zucchini Mania: Stuffed Edition

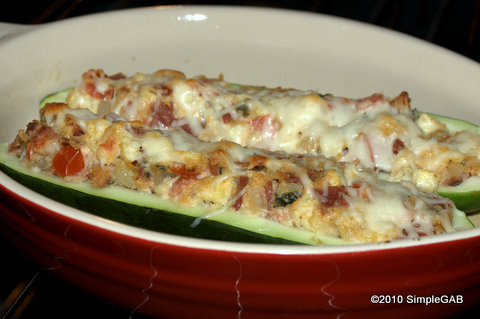
Zucchini part 2! The entree to the feast. This is a pretty traditional "I have to too much zucchini what am I gonna do?" dish. But, like so many traditional dishes, there is a good reason for that - because it is so. darn. good.
So. Darn. Good.
Classic meat meets cheese dish. Stuffed in a healthy exterior. 
Let's get cookin'


Oven Temp - 400
Prep Time - 20 minutes
Cook Time - 10 minutes
Total Time - 30 minutes

4 medium zucchini (or in my case, one giant zucchini)
1 pound ground beef 
1/2 cup chopped onion

3/4 cup marinara sauce
1/4 cup bread crumbs 
1/4 teaspoon salt 
1/4 teaspoon pepper 
1 cup  shredded cheddar cheese, divided
 
Cut zucchini in half the long way. Cut a thin slice from the bottom of each to make the zucchini sit flat. Scoop out pulp.


Cover  the shells and microwave on high for 3 minutes or until you can cut in easily with a knife. Drain fluid that gathers in the shell.
Meanwhile, in a large skillet, cook beef and onion over medium heat until meat is no longer pink.


 Remove from the heat and stir in  marinara sauce, bread crumbs, salt, pepper and 1/2 cup cheese.
Spoon about 1/4 cup into each shell.


Bake in oven at 400 for about 10 minutes. Sprinkle with remaining cheese.

Each half is almost 10 inches

I later heard that some people carve out zucchinis like this ^. I like the look of that so I think I'll try it next time.

Zucchini Mania: Chip Edition

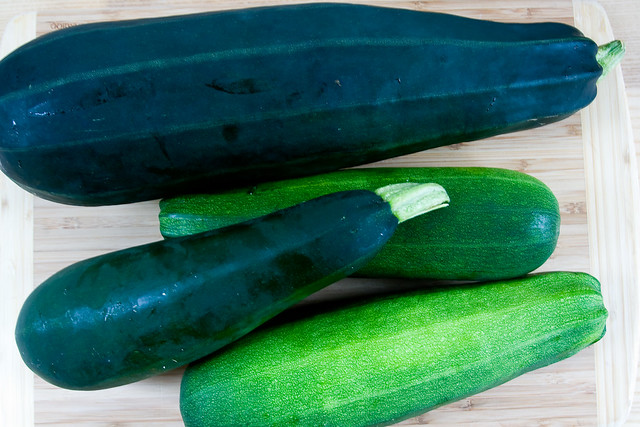
This is part one of a seemingly endless series of zucchini recipes. My friend went on vacation this past week leaving me his garden to care for. As he showed me around he excitedly pointed to a couple innocent little yellow flowers saying "The first zucchini of the season will be ready this week!". I was amazed that these little flowers would have time to grow into zucchini in just one week. Unfortunately, I was wrong. When I stopped by on Saturday to see if anything had happened, I saw the world's 7 largest zucchinis growing. The picture doesn't do them justice.

4 of the 7 monsters - all well over 1.5 feet long
Now, I'm sure you zucchini-experts are all rolling your eyes at me. Everyone should know that vegetables don't stop growing unless picked....everyone except me. Oh well.
 As you can see, I had my hands full - quite literally. I sat down and began listing all of the uses of zucchini I could think of. I spent all afternoon preparing a zucchini feast - appetizer, entree and dessert. Today, I present 3 new recipes, but more will follow soon enough. 

The first recipe I present to you is zucchini chips. They make an excellent little snack, so good in fact that I keep eating them every time I walk past their cooling spot - which is a lot given that I'm cooking all day today and they are waiting seductively on the counter.


2 small zucchini sliced about 1/4 inch thick
1/4 cup dry breadcrumbs 
1/4 cup grated Parmesan cheese 
1/4 teaspoon salt
1/4 teaspoon garlic powder 
pinch of pepper
1/4 cup milk 

Mix together the dry ingredients (everything other than milk and zucchini).


Dip zucchini in milk, then into dry ingredients. 
Place slices on a wire cooling rack on top of a pan to catch the crumbs.


Bake at 425 for about 30 minutes. Check after about 20 minutes to prevent burning.

Seductively cooling

Friday, July 20, 2012

Cheesecake Strawberries

As you already know, I love small things - miniature versions of bigger products. Because of this, it should come as no surprise that a dish like cheesecake-stuffed strawberries drew me in. A one-sbite dessert! How cute! It turned out there was more to these than meets the eye. Not only are they cute, but they are also delicious. 
The recipe is so simple, so easy but the product makes it look like much more effort went into the creation.  

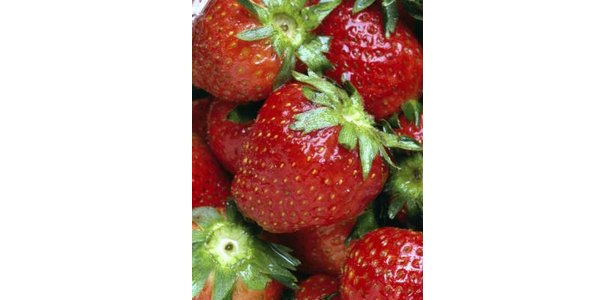
1 lb large strawberries
8 oz. cream cheese, softened
3-4 tbsp powdered sugar
1 tsp vanilla extract
graham cracker crumbs


Rinse strawberries and cut around the top of the strawberry. Remove the tops and clean out with a paring knife.


Beat cream cheese, powdered sugar, and vanilla until creamy. Pour cream cheese mix into a piping bag or ziploc with the corner snipped off.

Fill strawberries with cheesecake mixture. Once strawberries are filled, dip the top in graham cracker crumbs.


If not serving immediately, refrigerate until serving.

For extra yum, you can dip the strawberries in chocolate after they have been filled.


If any of you have recipe requests or suggestions, please comment! I'm eager to hear from you all!

Also! A great tip for transportation - use an egg carton! The strawberries fit perfectly.

Wednesday, July 18, 2012

(The Latest and Greatest) Healthy Chocolate Chip Cookies

I love chocolate. In fact, I love it the point where my love is unhealthy. Some may call it an addiction, based on my symptoms of withdrawal when I have not had chocolate in a week. Yet, as summer surrounds me and my thoughts turn beachward I remember why people opt out of eating delicious, chocolate dessert made with gallons of butter. 


However, do to my reliance on chocolate, I cannot ignore my tummy's grumbles for cookies. So instead I decided to modify several chocolate chip recipes and produce something that vaguely resembles healthy. 70 calories healthy. 2 grams of fat. 
 I'm not one to watch my weight or anything, but I know that numbers like that NEVER come with this much choco-deliciousness. 


Now, when I first hear someone describe their recipe as healthy, especially when it comes to desserts, I usually think of something along the lines of this:


Ewwwww
 Let me set you straight. Think this:

Heavenly

Oven Temp - 380
Prep Time - 15 minutes (plus cooling)
Bake Time - 7 minutes
Total Time - 30 minutes

(Makes about 30 cookies)

2 and 1/3 cup oat flour
1/4 tsp salt
1 tsp baking soda
1/2 cup brown sugar
1/2 cup white sugar
1 chocolate chips
2 tsp pure vanilla extract
4 tbsp vegetable or coconut oil (I love coconut oil)
1/4 cup to 3/4 cups milk

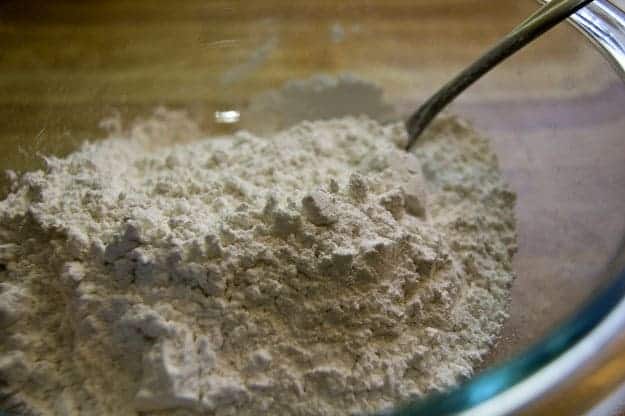
Special note! For those of you who, like me,  don't have oat flour here's an easy way to make your own. Take about 3 cups of rolled oats and blend them. They will turn into a very fine powder that should measure close to 2 and 1/3 cups.


Woah! Hold on a second - there's no eggs! Wait....but that means you can eat the raw dough.
Let me say it again.
You can eat the raw dough. 
That's right. Not only is this a healthy recipe, but it also makes an excellent snack. Alright, you can carry on now.

Combine dry ingredients and mix well.


Add the wet ingredients. For soft cookies, refrigerate until cold (otherwise, just bake right away).


Bake 7 minutes at 380 or until the cookies spread out and look slightly undercooked. The thing about this dough is that it will cook more easily on the cookie sheets than normal dough, so once you take it out, they will continue to cook for about 10 minutes.


Tuesday, July 17, 2012

New Age Pasta Salad


Sorry it's been so long since a new post! The computers went in for repair...
Last Saturday I went to synagogue for what was probably the first time since my Bat Mitzvah (and high holidays). You can imagine my shock to see the sanctuary had been redone. No longer were the cheap pews  bedecked with their turquoise cushion. Instead, comfy stylish chairs created a open, meeting-like atmosphere. The affect was lovely. 

Something along the lines of this....kind of

My father and I had attended because the Kiddush (prayer and food) following service was dedicated to a close family friend, honoring her work as President of the Synagogue. I had been told the food was to be especially good in her honor. While I usually enjoy the routine bagels, lox, white fish salad and cookies, I have to admit, I was looking forward to this feast.

The food of my people
 
As the service wrapped up, we entered the dining hall to be greeted by the singular best pasta salad I have ever had. It was so good, in fact, that I ran out to the store as soon as we got home and picked up as many of the ingredients as I could remember tasting in the salad.
It's as good as homemade macaroni and cheese. As satisfying as warm stew on a winter's day. Better than a sip of ice cold lemonade in the heat of summer. It knows who killed JFK.
Sorry...carried away. 
Anyway - delicious, and pretty darn healthy too. Fruits and veggies! 
 
1/2 cup Capers
1 cup Spinach, chopped
1 medium onion Onion
2/3 cup raisins
1 cup ricotta cheese
1 lb pasta, cooked
1/2 cup Olives, sliced
1 cup Peas
1/2 cup Almonds, sliced
1/2 cup cheddar, grated
1/2 cup celery, chopped
1/4 - 1/2 cup red wine vinegar


Pretty easy! All you do is soak the onions in the vinegar for 10 minutes. Now drain them.
Mix everything except for the cheese and almonds into the pasta and pour mixture into a casserole dish. Now, pour almonds on top and place cheese as the final layer.


Bake at 400 for about 15 minutes, so everything melts together. Quickly broil for about 3 minutes. Voila! Delicious.


Friday, July 6, 2012

Pasty Pie

What I love about this recipe is that if you double the dough, you can make some pasties which are a great substitute for sandwiches in a lunch. The word pasty is so homey and yummy. My sister came home over winter break this year with her heart set on making pasties. She told me about this elusive pasty-truck which drives around campus.

Roaming the streets of St. Paul
 
 She has always wanted to buy from it, but the one chance she had, she was running late for a quick meeting and by the time she came back outside, the truck had vanished. 


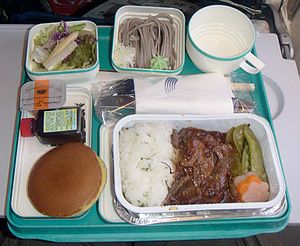
So, to substitute, we spent her first evening home making a huge batch of these delicious personal-sized meals. I've always loved individually portioned meals. When I was little, we used to have TV dinners one night a week. Everything was so nicely divided into tiny servings. I always took tiny, measured bites to bask in the smallness of each portion. Last year, I had the privilege of spending three weeks in Norway. While the trip was excellent, the tiny packaging of the plane meals may have been the highlight (kidding). 


I loved each portion and container of the meal, but the tiny, perfectly portioned olive oil bottle took the cake. 


It took me a long time to figure out what I wanted this recipe to be. When I started, all I knew was that I wanted to use mushrooms. Then, that I wanted to make pasties. One thing led to another and before I knew it, I had all the pans on the stove, boiling water for potatoes, broccoli, stirring meat, stirring onions. As I sat in the one rainbow colored chair in our kitchen, starring at the stove, I wondered what on earth I had gotten myself into. 
Here it is - one part pie, one part meat, one part potatoes and a layer on sneaky vegetables. 


For Crust:
1 1/4 cup flour
1/2 pound cold butter, cubed
Pinch o' salt
1/4 icy water


For Mashed Potatoes:
1 1/4 - 1 1/2 pounds potato (2 large potatoes)
2 - 3 tbls butter
salt to flavor
1/4 milk


For Meat Mix
1/2 beef, cooked (I just use 2 hamburger patties, already cooked)
1 full leek or half an onion (sliced)
2 cloves garlic, crushed
2 cups of chopped mushrooms
1 tbls butter
salt and pepper to flavor


Broccoli Layer:
1 crown of broccoli
1/2 tbls butter
1 tbls milk


Begin by chopping up the potatoes and placing them in pot of cold water. Boil them on the stove while you prepare the crust. Place flour in a mixing bowl. Add the salt and butter. It is easiest to cut the butter, but if you don't have the right tool you may mix by hand by squeezing the butter cubes between your fingers repeatedly. Once most of the butter has been squished, you may switch to a wooden spoon until the dough will stick together slightly when squeezed in your hand.


 Add the water in one tablespoon at a time until all the dough sticks together in a hard ball. Wrap up and put in the refrigerator until later.

Great, dough is done. Turn your focus back to the potatoes. You should take them out of the water once you can easily stick a knife through them. Place the hot potatoes in a bowl with the butter and let sit while it melts.


Mash potatoes and add milk and salt to form a smooth mixture. Set aside.

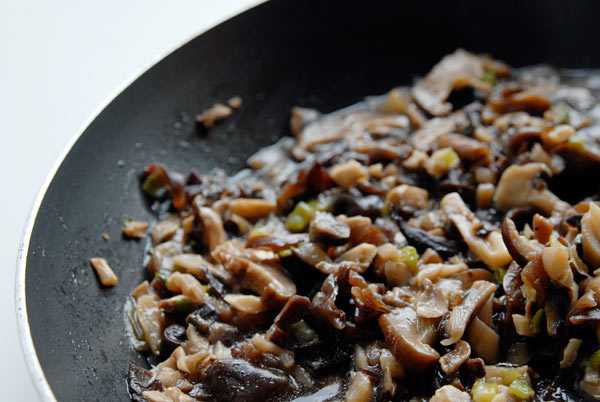
In the meantime, melt 1 tbls of butter in a pan. Add leek and mushrooms and saute until mushrooms soften. Add garlic, and continue to cook for 3 more minutes.

 
Drain the water (from the mushrooms) and mix in beef and salt and pepper. Set aside.

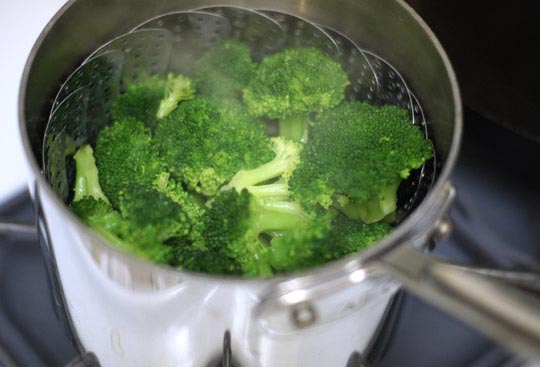
Steam broccoli for 7 minutes, remove from heat.


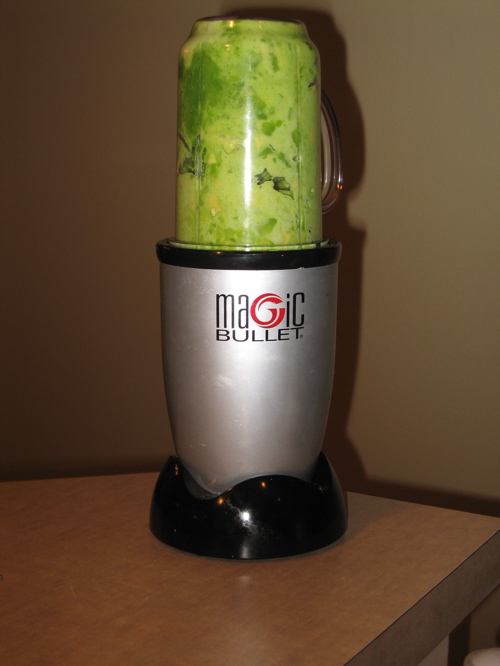
Blend with butter and milk. Set aside.

I LOVE the Magic Bullet
 
Take pie dough from fridge and divide in two. Roll one part out and press into pie pan. You will want a little bit of overhang. Place the other back in the fridge.


Smooth the potatoes into the bottom of the pie crust. Layer the broccoli on top. Meat on top of that. Roll out the rest of the pie dough and lay on top of the pie.

Use the overhang from the bottom dough to fold over the dough and press in, forming a tight seal.


Cut a few holes in the top to allow for expansion.
Bake at 400 for 30-35 minutes or until golden brown on top. Let cool, but serve warm for best results!

Wednesday, July 4, 2012

Follow By Email!

New feature! Follow me by email! Instead of having to check in every day to see new posts, recipes will be sent to your email, alerting every time a new recipe has been posted. You'll see the handy-dandy box on the left side the screen by the top of the page that says "Follow By Email".
You won't regret doing this.


Tuesday, July 3, 2012

Checkerboard Cookies

These are enchanting. Something about the organized appearance of a checkerboard is pleasing to the eye. Or perhaps it has something to do with the fact that these are so perfect looking, even though they are homemade cookies. I always feel extremely accomplished whenever I make these. 


They are a time commitment, they do not require much actual work, but because of the butteryness of the dough, the must be refrigerated between handling, so there is a lot of downtime between handling periods. 
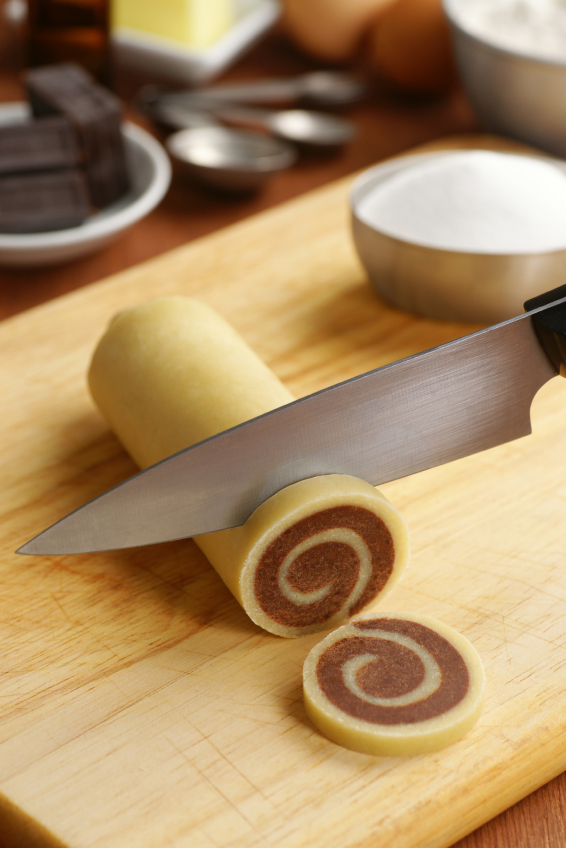
These buttery/chocolate cookies are cookies from my childhood. We used a similar dough to make pinwheel cookies and baked them on sticks to make a cookie-pop kind of thing.

Tis the season!
 For some reason, these cookies always make me think of the Fourth. 

Oven Temp - 350
Bake Time - 12 minutes
Prep Time - 45 minutes plus 6-36 hours of chilling
Total Time - usually 10 hours

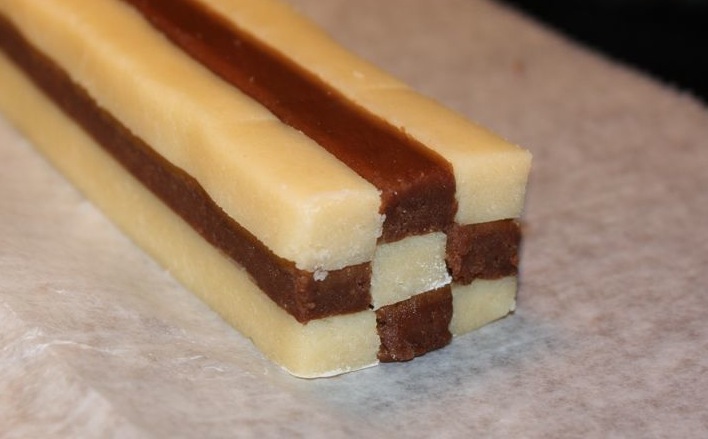
The goal of today's recipe
 5 1/3 cups all-purpose flour
1 tsp baking powder
1 tsp salt
1 lb (2 cups or 4 sticks) unsalted butter, at room temperature
2 cups granulated sugar
1 tbsp pure vanilla extract
2 large eggs, at room temperature
½ cup unsweetened cocoa powder

Let me say this - I know it's a gross amount of butter, BUT this is a recipe for 8 dozen cookies, so keep that in mind when you are waiting for the pound of butter to soften properly.


Sift together the flour, baking powder, and salt in a bowl and set aside. Cream the butter and sugar together in a large bowl until fluffy. Crack the eggs into the butter bowl and add vanilla extract. Pour the flour into the butter bowl while you mix it slowly. Be careful not to over mix this. Personally, I prefer to mix this dough with my hands.For some reason, it feels super light and fluffy, like a Temperpedic cookie.

Divide the dough in two. Knead the cocoa powder into one half of the dough. Divide each flavor in half for four total balls of dough, two chocolate and two vanilla.

Smooth inside, few bubbles are good
 
Form each into a rectangle, wrap in plastic, and refrigerate for 2 hours.


Take one portion of chocolate and one portion of vanilla out of the fridge. On a lightly floured surface, with a floured rolling pin, roll out the vanilla dough into a 12″ by 5″ rectangle. Cut the rectangle into nine strips, each 1/2″ thick. Repeat the process with the chocolate dough.

Now comes the tricky part (or at least the part that makes these look super fancy) - Form two checkerboard logs: delicately alternate chocolate and vanilla strips to form a three by three square. One log should go: vanilla chocolate vanilla, chocolate vanilla chocolate, vanilla chocolate vanilla. The other log should be chocolate vanilla chocolate, vanilla chocolate vanilla, chocolate vanilla chocolate. Press into the sides to make it as even a square as possible. Wrap with parchment paper or plastic wrap and chill for 2 hours.


Afterwards, roll the remaining vanilla portion into a rectangle of 12″ by 6″. Take the log with 4 strips of vanilla and wrap the dough around it to form an even border.


 Roll the log to press it in and define the corners. Repeat with the chocolate dough and the remaining log. Wrap the logs in parchment or plastic and refrigerate well, preferably overnight. This is a good breaking point. You can freeze them for later use of store them in fridge for a while.


When you’re ready to bake, preheat the oven to 350F. Using a very sharp knife, slice the cookie-dough log into ¼-inch thick slices.

My favorite part- so satisfying!

I found I had extra dough, so I just did the simple, classic pinwheel design as well


 Place on the prepared baking sheet leaving about 1 inch all way around them. Bake the cookies, in batches, for about 12 minutes until firm and golden brown on the bottom. Don’t let them bake for too long, or the color contrast between the chocolate and vanilla dough will be lost.Sit back and prepare to hear admiration!

As you can see, not my picture, sorry!