 |
| Boston Creme |
 |
| Cupcakes in Cones |
 |
| Ice Cream Cake |
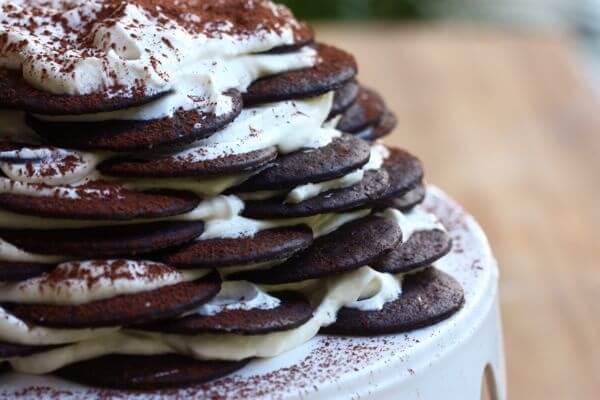 |
| Ice Box Cake |
 |
| Black Forest |
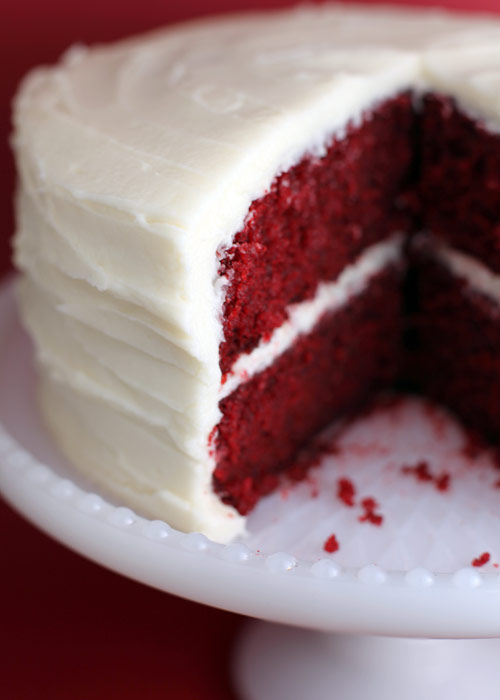 |
| Red Velvet |
It turns out that despite it's beauty and apparent complexity, the rainbow cake is actually not that difficult! In fact, here's a nice, easy-to-manage, not too time consuming recipe for you all! Wahoo!
 |
| Okay...yes, this was taken from Martha Stewart's website |
Oven Temp - 350
Cook Time - about 15 minutes per layer (but you can double up, so about 45 minutes total)
Preparation - about 25-30 minutes
Total Time - 1 hour 15 minutes
3 cups all-purpose flour
4 teaspoons baking powder
1/2 teaspoon salt
1 cup unsalted butter, room temperature
2 1/3 cups sugar
5 large egg whites, room temperature (The yolks are great for Eggs Benedict!)
2 teaspoons pure vanilla extract
1 1/2 cups milk, room temperature
Red, yellow, and blue food coloring
Buttercream Frosting
First thing - let's separate those egg whites from the yolk. Crack an egg in half over a bowl, holding the yolk in one half. The yolk should stay in tact as long as it doesn't meet the jagged edges of the egg shell. Slide the yolk into the other half, and pass it back and forth. This should allow the white to become separated from the yolk. You can store the yolks in a separate container. There are many recipes that require just the yolk, so you may want to hold unto them.
Good. We got that all cleared up.
So, because there are six colors in the rainbow, you need to make six colors. You can begin with all six colors, but personally the sets sold by me are only red, yellow, green and blue. So you get to make your own colors! I mix the dyes and test the color on a paper towel.
 |
| Classic. |
You will also need to bake each later separately. It would be great if you had 6 9-inch pans, but, you may be like me and only have 4. I just clean our two pans and use them again.
Mix the flour, baking powder and salt together and set aside.
Cream together butter and sugar. First, slowly add the egg whites and mix until completely combined. Add the vanilla. Slowly pour in the flour mixture and milk - beginning with the flour and ending with the milk.
 |
| Notice that it is lighter than most cake batters |
Divide batter evenly between six medium bowls. Add as much dye as you see fit to each bowl (I love that part) and transfer each color to an individual cake pan.
 |
| A little gross - it looks like paint |
You can bake them now - at 350 for about 15 minutes each (test doneness via the "Toothpick Test").
Once they are done baking, let cool for 10 minutes on wire racks.
Trim the tops of the cakes to make level. Place four strips of parchment paper around perimeter of a serving plate (This will catch any excess frosting so the cake will look really clean at the end). Place the purple layer on the cake plate. Frost the cake very lightly, making sure a little frosting goes over the edges. Layer the blue cake on top and repeat through orange. Place the remaining red layer on top, bottom-side up. Gently sweep away any loose crumbs with a pastry brush.

Finish the frosting process by smoothing over the rest of the layers. Refrigerate until set, about 30 minutes.
No comments:
Post a Comment