Sunday, September 30, 2012

Moon Pies

Moon Pies. Intrigue. Not cow pies (thank goodness), but some celestial version. Or maybe these bad boys come to mind:

It's the kind of snack you grab at the gas station as an excuse to use their bathroom. However, on my hunt for a good base whoopie pie recipe, I stumbled across a recipe for homemade moon pies. Needless to say,  I couldn't pass up the opportunity to try out such an unusual, regional dessert. Indeed, these taste bits o' heaven are a traditional Mardi Gras treat, so what better time of year to make them than early Autumn!
I can't honestly tell you that I didn't make them because they have a cool name, but that's kind of like the opposite of judging a book by it's cover, right? Respecting a recipe for it's title! 
Because it IS such an uncommon recipe, I dared not stray too far from direction, so here's the link to the website I got it from http://www.browneyedbaker.com/2011/03/04/moon-pies-recipe/
There are a handful of alterations I would make, but I'll make a note of that as we go along!


1 batch will give you 15 double-decker moon pies
Oven Temp: 350
Prep Time 1 hour 15 minutes
Bake Time: 30 minutes
Total Time: 2 hours

For the Cookies:
8 ounces (1 cup) unsalted butter, at room temperature
¾ cup light brown sugar
1 egg
1 teaspoon vanilla extract
2¼ cups all-purpose flour
½ teaspoon salt

For the Marshmallow Filling:
2 egg whites
Pinch cream of tartar
Pinch salt
2/3 cup light corn syrup
2 teaspoons vanilla extract
1 cup powdered sugar, sifted

For the Chocolate Coating:
12 ounces semisweet chocolate
¼ cup vegetable oil


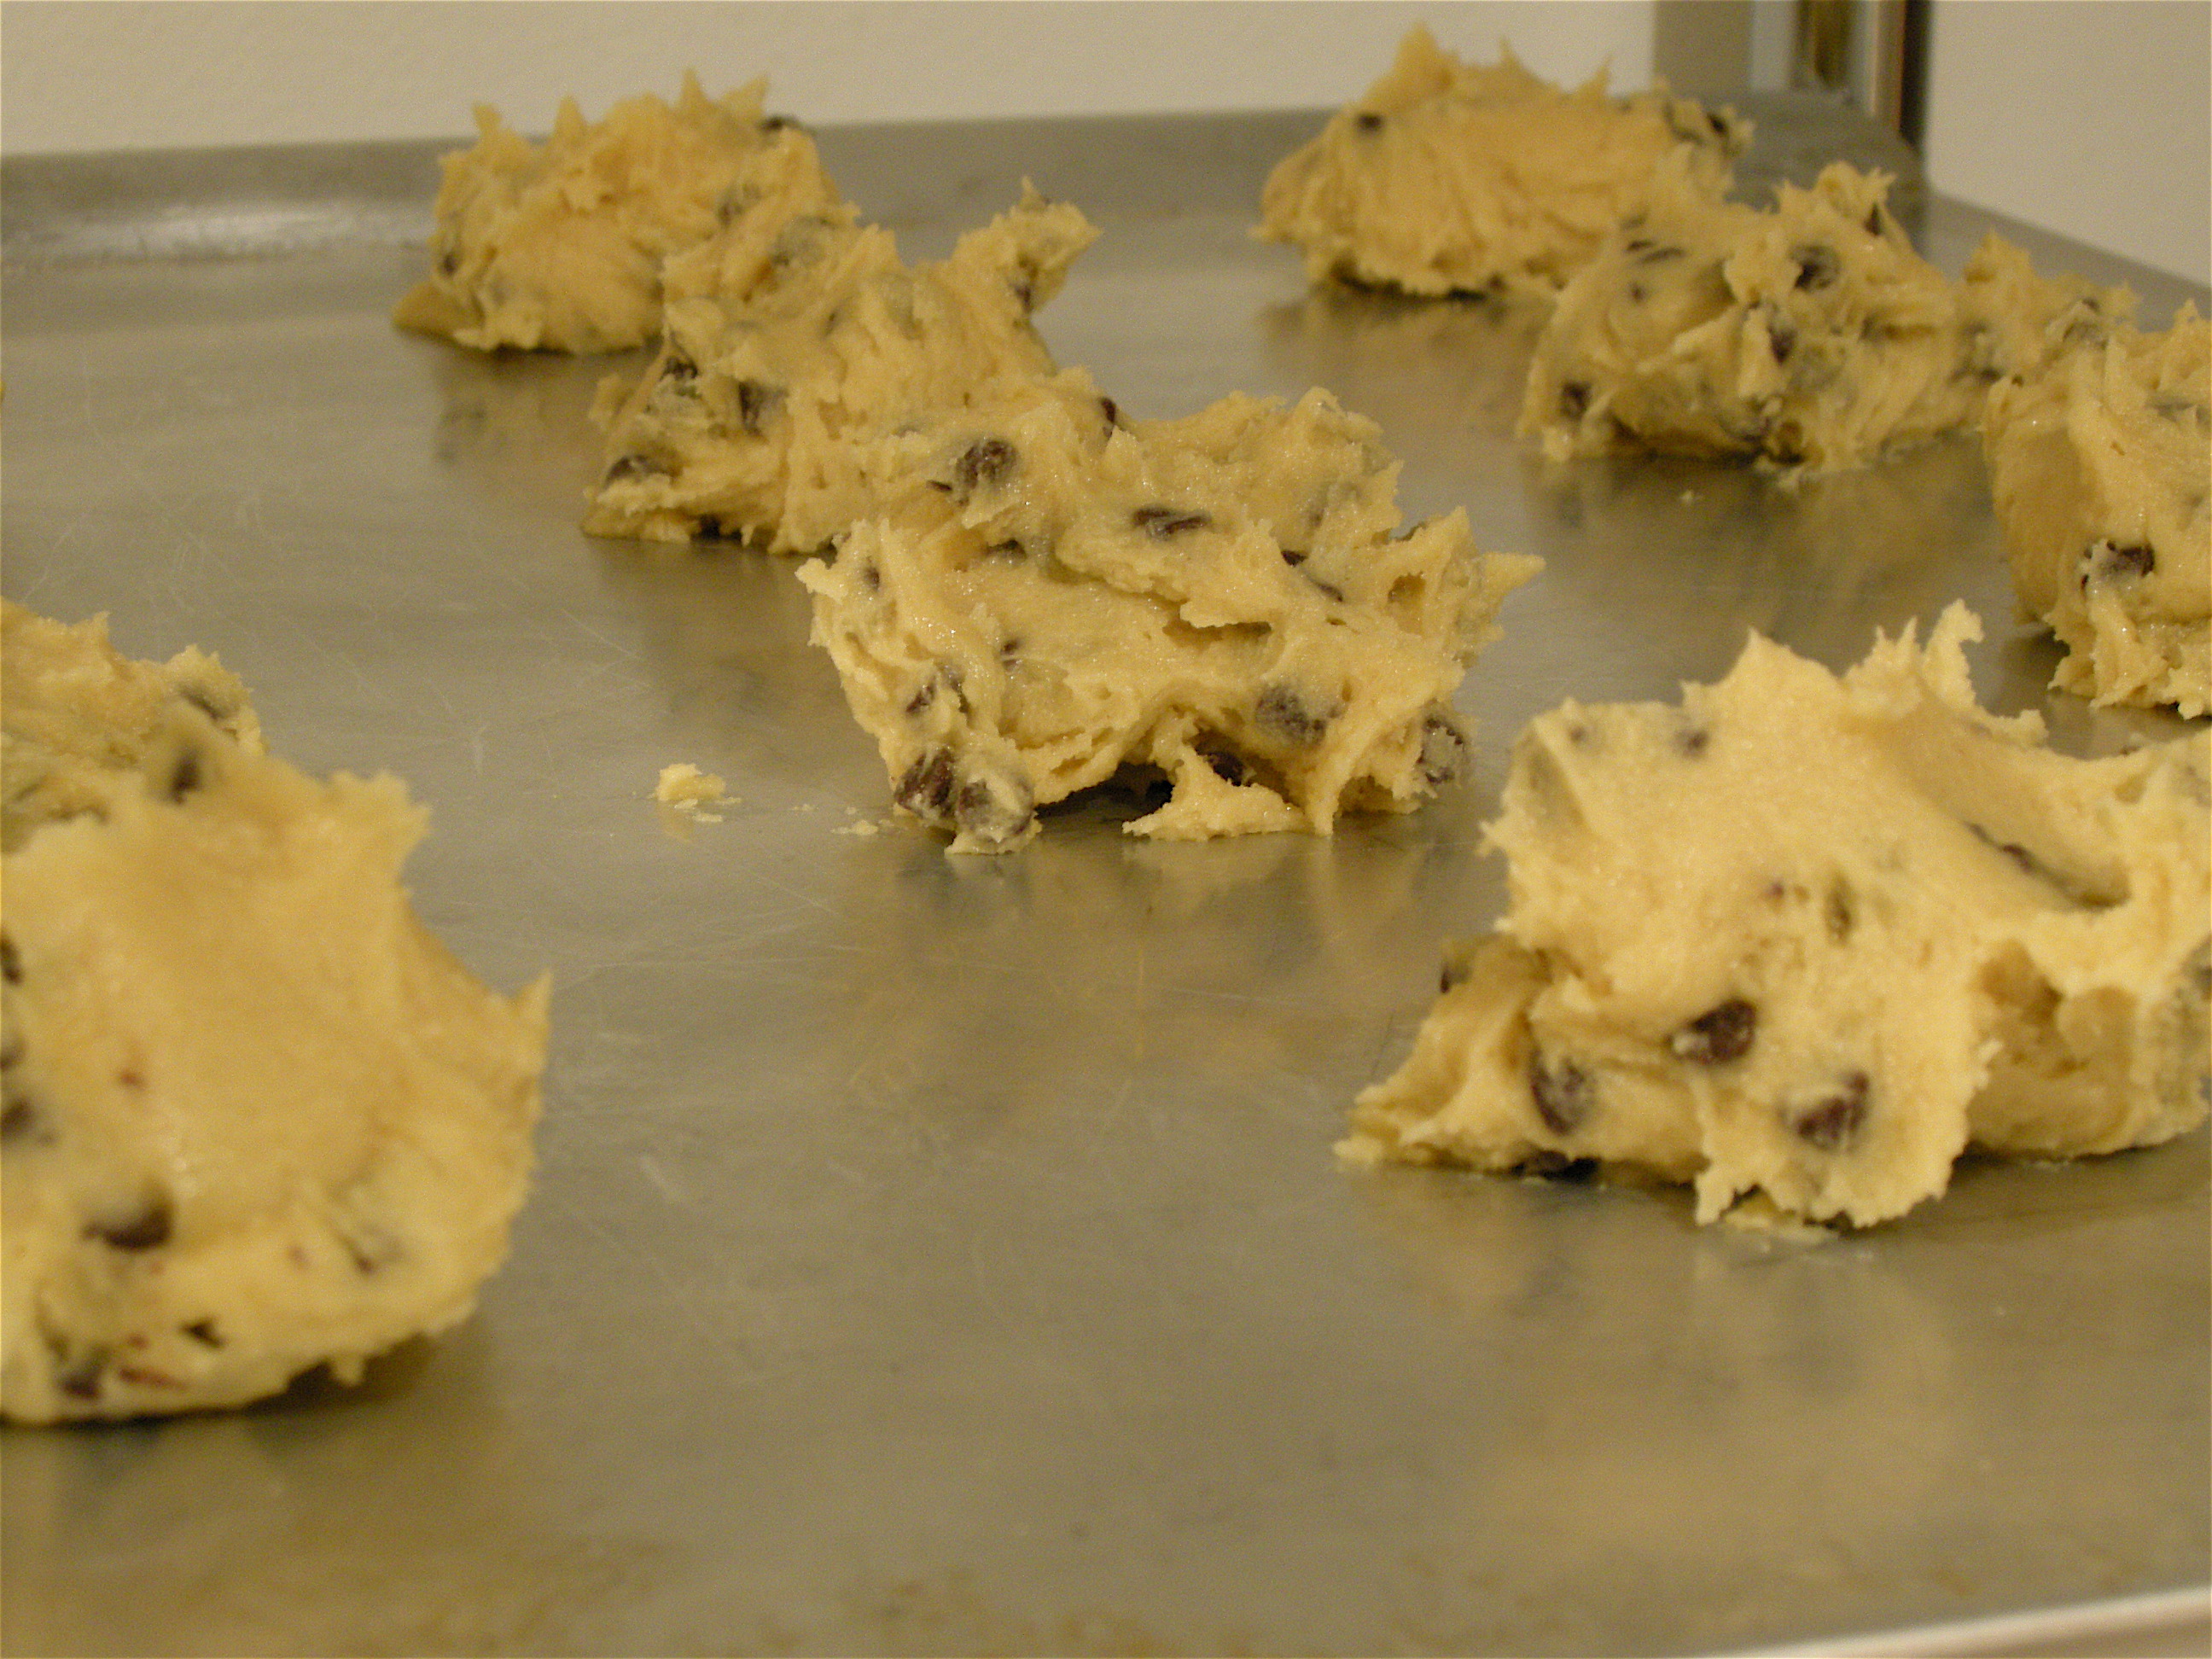
Begin by beating the butter until creamy. Add the brown sugar and mix until light and fluffy. Add the egg and the vanilla extract, and beat to combine. Mix in the flour and the salt until you get a smooth dough. You may wish to add a little more flour if it is sticky. The dough reminded me a lot of gingerbread dough, if you're familiar.


 Divide the dough in two, shape into disks, wrap in plastic wrap and refrigerate for at least 30 minutes.
After 30 minutes, preheat the oven to 350 F.  Line two baking sheets with parchment paper (wahoo! first time I ever splurged and bought parchment paper- I don't ever want to go back) or grease; set aside. Remove one disk from the refrigerator roll out to about 1/8th inch thickness. For these, it won't hurt to be a little on the thinner side (it gives a better creme to cookie ratio). Cut circles into the dough (2 -3 inches in diameter, ideally using a mug or something to get a lovely shape).


 Place circles unto cookie sheets and refrigerate for 10 minutes.
After 10 minutes, bake cookies (12 to a sheet) for 12 to 14 minutes, or until lightly browned. Cool on the pans for a couple of minutes, and then move to a cooling rack to cool completely.
My helpful hint here - I used three baking sheets, I would have one in the fridge with uncooked dough, one baking and then put another in after 7 minutes so the sheets were staggered. It reduced the baking time.

Voila!

Once everything has been baked and is starting to cool (or you can start earlier if you are an octopus and have enough arms to be doing everything) you can begin the filling! Whisk the egg whites with the cream of tartar and the salt until firm peaks form (see image below).

From http://www.crunchyrock.com/2011/01/cinnamon-apple-waffles.html

 In a small saucepan heat the corn syrup to 225 to 230 degrees but don't stir. Be sure to get it this hot otherwise the creme will be too thin to use.


Slowly drizzle the hot corn syrup into the egg whites and beat at high speed until glossy, about 2 minutes. At this point you may beat in the vanilla extract and the powdered sugar.


Glob a layer of creme unto two cookies. Place one on top of the other, and layer with a third. Gentle press together to spread the creme out.
Once the pies have been layered, proceed to chocolate stage!


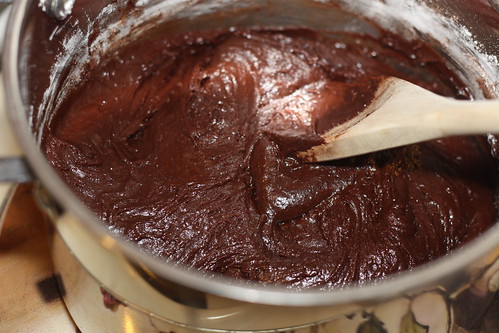
Melt the chocolate and vegetable oil together until completely smooth. Place the assembled cookies on a wire rack set over a sheet of wax paper. Spoon the melted chocolate over each cookie so that it runs down the sides (giving it that beautiful homemade look) and covers most of the cookie.


Let cool for 2 hours and took joy in knowing you made such a funky little dessert!


Now, if I were to make these again (as I hope to do!), I would make these super chocolately. I would make the filling chocolate (by making some kind of ganache/marshmallow creme mix) as well as the cookie (maybe substituting 1/2 cup of cocoa powder for 1/2 of flour). 

Sunday, September 23, 2012

Chocolate Chip Apple Cake

It's so rare to find a recipe that incorporates both chocolate and apples. But given that we still have the greater part of a half-bushel of apples left and I had a hot desire to make something chocolate today, I knew I had few options. It's also been a long time since I've made cake.
That's one of those things in life that really upsets me - the lack of cake-making. We've come so far, yet I still find myself waiting patiently for the nearest birthday to make a new cake. And even then it must be the birthday of someone you're really close to. Also, in my family, the birthday cake is a classic yellow cake with M&M's and chocolate frosting. So it's been a LONG time since I've tried a new cake and this doesn't even really because it has a huge whole in the middle. And no frosting! What is this?! 


Oh well...a cake is a cake I suppose. 
In other news, it appears I'm sick. Hopefully no one will catch my disease from eating this scrumptious, unusual choco-apple blend. But even if they do, it's gonna be worth it.

Oven Temp - 325
Bake Time - 1 hr, 15 mints
Prep Time - 20 mints
Total Time - 1 hr, 45 mints

1 cup room-temp butter
2 cups white sugar
3 eggs
1/2 cup water
1 tablespoon vaniller extract
2 1/2 cups flour
2 tablespoons unsweetened cocoa powder
1 teaspoon baking soda
1 teaspoon ground cinnamon
1 teaspoon ground nutmeg
2 cups apples - peeled, cored and finely diced
1 cup semisweet chocolate chips 

Grease and flour a tube pan (9 or 10 inch diameter). 


In a large bowl cream the butter and sugar. Beat in the eggs then add the water and the vanilla. 
Stir the flour, cocoa, baking soda, ground cinnamon and ground nutmeg together.


 Beat this mixture into the creamed mixture.


 Stir in the chopped apples and the semisweet chocolate chips. Pour the batter into the prepared pan.
Bake at 325 for 1 hour and 15 minutes or until the cake tests done when a toothpick is inserted near the center. Make sure to rotate it after about 30 mints.


 Transfer to a rack to cool. Makes about 16 servings, so be ready to share.

Sunday, September 16, 2012

Apple Butter

This weekend I ventured out for my first ever apple-picking adventure! I was accompanied by two of my friends and we spent a couple hours meandering through a local orchard tasting apples on most trees. I felt like three little runaways scavenging through a field, nibbling our way from one end to the other, looking for the greatest taste. The best flavor came from a lone tree on the edge of the orchard. It was surrounded by other apple trees, chock-full of beautiful red apples that had horrible flavor. My friend Sequoia spotted a huge tree, with no family nearby whose lower layers had been nearly picked clean. Luckily Sequoia, always one with the trees, scampered up to the top and tossed apples down to me to complete our fine collection.


 After returning home with a bellyful o' apple I frantically began looking up recipes to help deplete the enormous stock. And that's when I  found this gem - there's nothing quite so autumny and homey as homemade apple butter. 


Although there is no butter in apple butter, it has a unique spreadability coupled with a very appleine flavor. Something thinner than jelly, but with more natural love than a sauce. As an added bonus, apple butter is a very easy way to make your house smell nice all day long. 


makes 3 pints (enough to share a couple jars with friends)
12 medium apples (cooking apples are ideal)
2 1/2 cups granulated white sugar
1/2 teaspoon ground cloves
1/2 teaspoon ground allspice
1 teaspoon ground cinnamon
1 cup cider vinegar

Begin by doing the bulk of the work- peel, core and cut apples into pieces no larger than a square inch. Place in large pot with 1/2 cup water and heat over medium heat.


As the apples begin to fall apart into applesauce goo, be stirring so nothing burns. Once most of the apples have disintegrated, puree into uniform texture.


Now, stir all ingredients into the same pot.


Cook on medium-low heat 3-5 hours or until the mixture has come to optimal thickness.
After about 2 hours, I stopped and strained the apple goop. 
It's important to remember that what we're making is basically just a simple syrup (sugar and water), so the longer you boil it, the thicker it will become and more syrup-like. So you really get to control the consistency here.
Fill jars leaving 1/4 inch head space. As the apple butter is very thick, jiggle the jars or stir with a chopstick to release any air pockets.
Wipe rims and place two part lids on jars. If you have the proper tools, which I do not, you'll want to sanitize the jars to make them last as long as possible. I just carefully wash mason jars and make sure to eat it all quickly!


Sunday, September 9, 2012

Brownie-Stuffed Chocolate Chip Cookies

Several months ago my friend and I decided to get together and bake. Unfortunately, neither of us are particularly decisive people so what ensued was about 90 minutes of debating what actually to bake. We tossed around ideas like peanut butter cups and peppermint patties but decided those were too much effort. However, we wanted to make something more than just the routine chocolate chip cookie or brownie recipe. 
And that's when it hit us. Why settle for one delicious fatty dessert when you can slam two together and produce a fantastical dessert which makes dreams come true. 
Conveniently, it's my friends birthday today, so I get to multitask by both making a recipe and also a present! Shout out to Elijah - the big 17, old man. This one's for you


For this I use the one-bowl brownie recipe (can I get some applause for mastering the in-text hyperlink?) and a "stuffed chocolate chip cookie" recipe because when you slam two desserts together you need the right base recipes.
Game Plan:

+


Oven Temp - 350 for both parts
Prep Time - 15 minutes for brownies, 20 minutes for cookies + 30 minutes cooling
Bake Time - 20 for brownies + 20 for cookies
Total Time - 2 hours (including cooling of cookies and brownies)

Brownies (you want to make these first!)
4 squares unsweetened baking chocolate
3/4 cups butter or margarine
2 cups sugar
3 eggs
1 tsp vanilla
1 cup flour

Cookie Dough*
2 sticks softened butter
1 cup granulated sugar
3/4 cup packed light brown sugar
2 eggs
1 Tablespoon vanilla
3 1/2 cup all purpose flour
1 teaspoon kosher salt
1 teaspoon baking soda
2 cups semi sweet chocolate chips

Make the brownies first, because you want them to be cooled before you stuff them into the cookies. I would recommend making the cookie dough while the brownies bake and cooling the dough while the brownies cool.

Preheat oven to 350 degrees F.  Begin preparing brownies.  Microwave the chocolate and butter until the butter is melted.
You can cover the bowl up to prevent splashes by using a paper towel. The melting should take about two minutes. Stir until the  chocolate melts as well.
Mix in the vanilla and sugar. Crack eggs one by one. Stir in flour and mix well.


Take a 9 by 13 pan and line with tin foil. Grease the foil. Pour batter into the pan and bake for 20-25 minutes. When a toothpick is inserted, fudgy crumbs should come out too. These will be a little less baked than you'd normally want, but they will be baked again in the cookies.


Now comes cookie time!


Beat the butter and sugars until light and fluffy.  Add eggs and vanilla, continue to beat until well combined.
Place flour, salt and baking soda into a bowl; mix to combine then add slowly to wet ingredients along with the chocolate chips.

Prepped for fridgeration


Roll into 30 balls and refrigerate for  30 minutes.
In the meantime, as the brownies cool, mash them up into a delicious blob of chocohappiness (you may eat at will, private).


Flatten out a cookie ball and spoon some brownie into it. Flatten out another cookie ball and cover the brownie blob, flattening the two cookie dough pieces together to form a closed sandwich. Gently press and enclose brownie with dough adding pinches more dough to cover sides if needed.  Place 6 filled cookies onto a greased baking sheet and bake for 18-22 minutes or until edges are golden brown.  Remove and let cool for 15 minutes before removing from baking sheet. 


While this is not my favorite recipe (my favorite recipe is the one listed under something along the lines of the most incredible chocolate chip cookies ever), it is ideal for the creation of a "stuffed cookie".  HOWEVER, if you do happen to try this out with my chocolate chip cookie recipe, I'd be really eager to hear how that works out!


Wednesday, September 5, 2012

Sunday Updates

Because I am a highly important and productive member of society (insert laugh track here) I think it's for the best that I make Sundays my official new post day. This also conveniently provides an opportunity for you, the viewer, to get on my case if I do not fulfill my promise to you. Here it is, my official promise:
I, your dedicated blogger, promise that I will uphold my weekly updates by creating, photoing and blogging a brand-spankin' new recipe each AND every Sunday.

There. 

In return I expect your unwavering love and admiration in the form of fan letters which can be written to itsallez@gmail.com addressed to "Dearly Beloved".

Monday, September 3, 2012

Munchie Mania! (Part 1)

Every other year or so I discover this fantastic little  book called "Weird Snacks"

Every time I see it, I feel obligated (mostly by my tummy) to investigate the recipe it provides. Although I have only actually tried a handful, I'm always delighted and intrigued by the suggestions. Most come in the format of "Pour a cup of ice cold milk. Stir in a tablespoon of maple syrup for a sugar treat!". There's no true measurements, only suggestions, which is just my type of cooking! Here's a few of MY favorite snickersnacks:

Flavorful Popcorn - With a batch of regular popcorn (movie-theater butter tastes the best, of course) sprinkle layers with curry powder and nutritional yeast. The yeast adds a kind of cheesy flavor. It goes good on a lot of different foods.

Pidge Pasta - Before I delve into this one, let me explain that as the youngest child I have acquired approximately 67 nicknames but the most commonly used one is Pidge (or Pidgeon). Melt equal amounts of butter (I recommend SmartBalance for this recipe!) and simple tomato sauce (I prefer as plain tomatoey as you can find) over a bowl of pasta. Sprinkle with salt.

Ants on a Log - Classic snack. Take a strip of celery, fill with peanut butter and top with raisins or chocolate chips.

All We Have is Chocolate Chips Dessert - Layer chocolate chips in a microwavable bowl; microwave until just melt, making sure not to burn. Smooth out and top with whipped cream for a quick chocolate fix.

Sammy Snacks
Cheesy Pasta - Melt about a tablespoon of butter (SmartBalance!) over pasta and top with parmesan cheese. Mmmmmmmm....

Sammy Snack - My lovely sister, Samantha, loves pie crust. Whenever I bake a pie, I always make sure to cut off a 12 inch strip which I cut into bite-size bits and bake for her so she has something to snack on. 


Bake to School Baking: Muffins

My final year of high school begins TOMORROW. With cross country practice, a pretty heavy school load, and college applications I can only imagine that I'll be fairly busy this year. On  the other hand, one of the my worst habits is stress baking. Unfortunately, baking tends to take a fair amount of time thus reducing the time I'd have to do homework or study for a test - you can see why it's such a terrible habit. I decided that if I'm stress baking, I might as well have some good come out of it; afterall, with only me and my dad home we can hardly manage a batch of muffins or cookies on our own. 
THIS is the way to a woman's heart


Instead, I'm turning to my friends. Because we all know that's what friends are for. Encouraging your awful baking habits. 
These muffins are my favvvvvvvvorite. Not a huge muffin fan, but I love raspberries and I love chocolate even more. The basic muffin recipe is fairly generic, a perfect base for any sweet or savory muffin, so it's a good one to keep in the back of your mind.
  
Oven Temp - 400* (see below)
Prep Time - 15 minutes
Bake Time - 25-30 minutes
Total Time - 50 minutes

2 cups all-purpose flour
3 teaspoons baking powder
1/2 teaspoon salt
3/4 cup white sugar
1 egg **
1 cup milk
1/4 cup vegetable oil
1 cup raspberries (while fresh are always best, frozen ones are good too - but DON'T thaw them****)
3/4 cup chocolate chips (it's kind of nice to use the mini ones in this recipe!)

  
Preheat oven to 425* degrees F
Stir together the flour, baking powder, salt and sugar in a large bowl. Make a well in the center. In a small bowl or 2 cup measuring cup, beat egg with a fork. Stir in milk and oil. Pour all at once into the well in the flour mixture. Mix quickly and lightly with a fork until moistened, but do not beat. The batter will be lumpy.


 Pour the batter into paper lined muffin pan cups. 


Bake at 400 for 25 minutes, or until golden.  


Alternative Recipes:
      Blueberry Muffins: Add 1 cup fresh blueberries.
      Raisin Muffins: Add 1 cup finely chopped raisins. 
      Date Muffins: Add 1 cup finely chopped dates. 
      Cheese Muffins: Fold in 1 cup grated sharp yellow cheese. 
      Bacon Muffins: Fold 1/4 cup crisp cooked bacon, broken into bits.

Bacon muffin....interesting


* To get a really nice muffin top (on the muffins, not on you) preheat the oven to 425. As soon as you place the muffins in, turn the temperature down to 400.The initial high heat will cause the batter to have rapid rise during the first few minutes of baking thus producing the desirable top.
**Substitute 2 egg whites for one egg in the recipe. If these are stiffly beaten and folded in at the end it will produce a lighter muffin with less fat. 
***I'm sure you're dying to know why you don't want to thaw the frozen raspberries. If you DO thaw them, they become quite mushy so instead of a nice little raspberry in your muffin, you'll be encountering a mild raspberry flavor throughout without the satisfaction of actually eating one. 

Can-Do Papa's 24-Hour Pickles

I  have the greatest papa in the world. He has brought my family red-beet eggs, maple syrup salmon and the refrigerator staple 24-hour pickles.
As a little girl, I remember this great ceramic pot we had. Sometimes it was used to store my mom's homemade cookies, sometimes my sisters would try to make me wear it as a hat, but mostly it was used for homemade pickles.


 My mom made these great batches of pickles. We used to go to a local farm called The Foodbank Farm where we had a share and we'd buy pickling cukes almost every week. But her recipe required a lot of sitting around and waiting for cukes to sourify.

The Food Bank Farm

I would never have believed in such a thing as 24 hour pickles except that I've met and ate them. These are sour, crispy and extremely fresh-tasting. My sister and I (she who no longer tries to put the pot on my head) will frequently encounter each other in the kitchen as we both go in for pickle snacks. This, of course, results in a brief chat as we ladies crunch away.


Here's the recipe as directly written by The Can-Do Man himself:
Bonus Points if the dill is from your friend's garden


12 pickling cucumbers
1 tablespoon canning salt or kosher salt (vary as desired)
½ cup fresh dill (vary as desired)
1/2 onion sliced thin
3 cloves garlic peeled and sliced thin
1 teaspoon mustard or celery seeds
1 cup vinegar (vary as desired)
3 cups water
1 grape leaf to ensure crispness (optional)

1. Select the cucumbers
a. A good one is dark green, firm, not bloated with lots of warts.
b. Overripe cucumbers made mushy pickles.
2. Wash and cut the cucumbers
a. Use cold water
b. Cut ¼ inch off the ends (optional)
c. Cut into 1/6 length-wise wedges to ensure thorough pickling 
3. Put cucumbers in jar
4. Mix the pickling mix, vinegar and water and bring to a near boil
5. Pour the liquid over the cucumbers to cover
6. Close jar
7. Refrigerate