They have a filling. Yeah. Another filled cupcake.
Shhhh! Don't tell your friends!
But these ones are wayyyyy easy. It'll look all fancy and impressive, like that time you carved out the middle and filled the cupcakes. But you don't have to do that here! Oh, no. Not at all. Way easy. Way cool.
Bake Temp: 375
Prep Time: 30 minutes
Bake Time: 20 minutes
Decorating Time: 15 minutes
Ready In: 1 hour and 30 minutes
For the frosting:
I made a basic cream cheese frosting, but you can use whatever you like!
1 cup cream cheese
1/4 cup room temp butter
1 cup confectioner's sugar
1/2 tsp vanilla
1 tbls cocoa powder

For the chocolate stuffing:
1 cup milk chocolate chips
1/3 cup heavy cream
1 tablespoon unsalted butter
For the cupcakes:
1 cup all-purpose flour
2 teaspoon unsweetened cocoa powder
1/4 teaspoon salt
3/4 cup granulated sugar
1/4 cup unsalted butter, at room temperature
1 large egg
2 teaspoons red food coloring
1/2 teaspoon vanilla extract
1/2 cup buttermilk
1/2 teaspoon baking soda
1/2 teaspoon vinegar
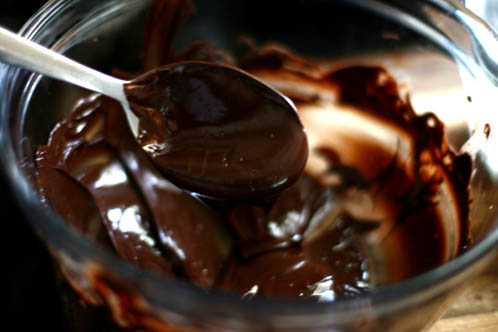
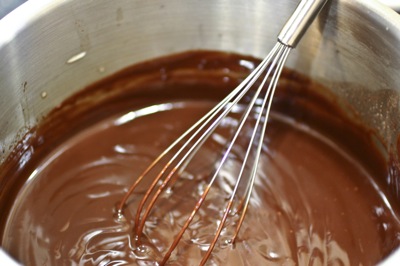
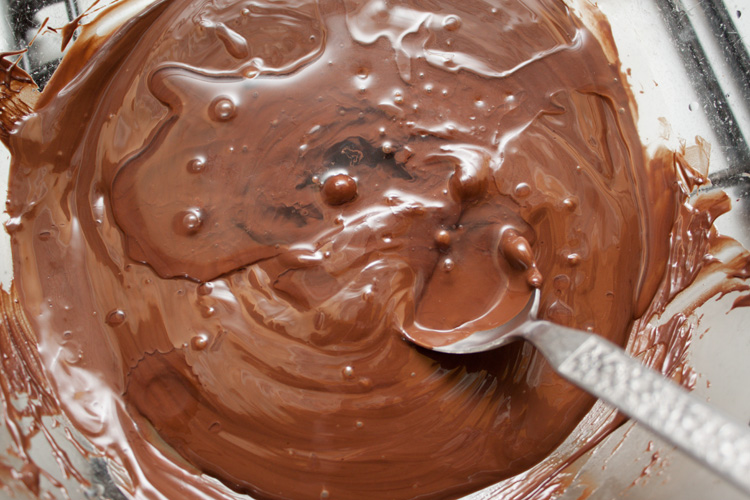
Begin by making the chocolate filling. It's very similar to the ganache we made a few weeks ago, but this is a little lighter and more melty.
In a small saucepan combine chocolate, cream, and butter.

Stir over low heat until chocolate is melted. Transfer to a small bow to freeze for about 1 hour.

In the meantime, make your frosting. Mix together everything except for the cocoa powder. Split into two bowls. Add the cocoa powder to one bowl.
You may have a little down time right now, between making the cupcake batter and waiting for the filling to harden enough to form. If the ganache is hard enough to roll into balls, go ahead and do that. Place the balls on wax paper and return to freezer.
Cupcake time.
Preheat oven to 375 degrees F. Line a standard muffin tin with paper liners.
In a small bowl sift flour, cocoa powder, and salt. Set aside.
In the bowl of an electric mixer beat butter and sugar on medium for
2-3 minutes, until light in color and well combined.
 Beat in egg, food
coloring, and vanilla. Alternately add flour mixture and buttermilk,
beating on low speed after each addition just until combined.
Beat in egg, food
coloring, and vanilla. Alternately add flour mixture and buttermilk,
beating on low speed after each addition just until combined.
In a small bowl combine baking soda and vinegar. Stir into batter.
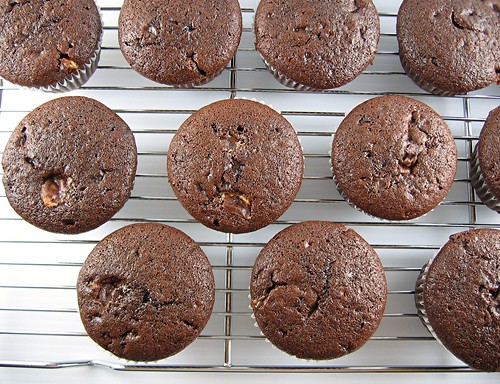
Bake 15-17 minutes, or until tops spring back when lightly touched.
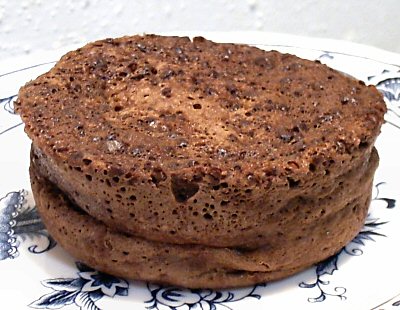
Take them out and let them cool completely. As always, this is really key. Warm cupcakes will melt the frosting. When completely cool, you may frost them. For the classic black and white cookie look (which is what I was going for) frost one half with vanilla frosting and the other with chocolate frosting.


Here you can the wrappers I used. I indulged and spent the extra 50 cents or so to get the beautiful things. They have an inside layer of foil, so the color wouldn't bleed. When I took them out of the oven they did have kind of a strange smell but it went away. And given the nature of these cupcakes I'm pretty glad I got the extra lining.
In a small saucepan combine chocolate, cream, and butter.

Stir over low heat until chocolate is melted. Transfer to a small bow to freeze for about 1 hour.

In the meantime, make your frosting. Mix together everything except for the cocoa powder. Split into two bowls. Add the cocoa powder to one bowl.
You may have a little down time right now, between making the cupcake batter and waiting for the filling to harden enough to form. If the ganache is hard enough to roll into balls, go ahead and do that. Place the balls on wax paper and return to freezer.
Cupcake time.
Preheat oven to 375 degrees F. Line a standard muffin tin with paper liners.
In a small bowl sift flour, cocoa powder, and salt. Set aside.
 |
| Here's the right texture for butter/sugar |
 Beat in egg, food
coloring, and vanilla. Alternately add flour mixture and buttermilk,
beating on low speed after each addition just until combined.
Beat in egg, food
coloring, and vanilla. Alternately add flour mixture and buttermilk,
beating on low speed after each addition just until combined.In a small bowl combine baking soda and vinegar. Stir into batter.
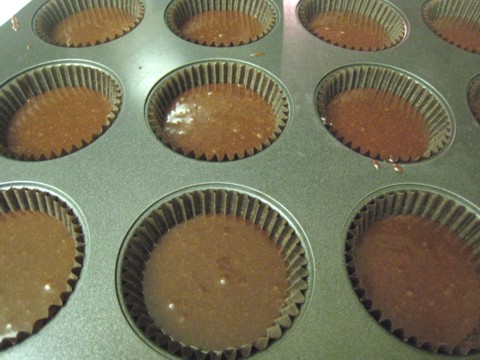
Divide half the batter among prepared cups. 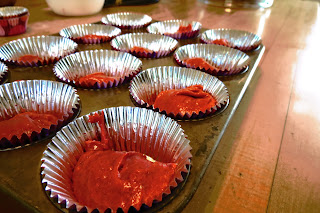
Place a ball of chocolate into center of each cup. Top evenly with remaining batter.
Bake 15-17 minutes, or until tops spring back when lightly touched.
Take them out and let them cool completely. As always, this is really key. Warm cupcakes will melt the frosting. When completely cool, you may frost them. For the classic black and white cookie look (which is what I was going for) frost one half with vanilla frosting and the other with chocolate frosting.


Here you can the wrappers I used. I indulged and spent the extra 50 cents or so to get the beautiful things. They have an inside layer of foil, so the color wouldn't bleed. When I took them out of the oven they did have kind of a strange smell but it went away. And given the nature of these cupcakes I'm pretty glad I got the extra lining.


