Saturday, June 30, 2012

Cupcakes in Cones

Alright, you all asked for it - Cupackes in Cones!
This is an old family favorite. I remember toddling into preschool carrying a huge plastic container full of these suckers. Everyone loved them. If possible, they make cupcakes even better. You bake them in the cones, so not only do you get to eat the cupcake "wrapper", you have fewer dishes to wash! Another great thing- you can use cake mix to make these, so if you find yourself in a time crunch, these will make it look like you went the extra mile, while secretly doing less work!


Bake at 375 degrees
Bake for 15-20 minutes
Prep time is 15  minutes
Total time is 40 minutes
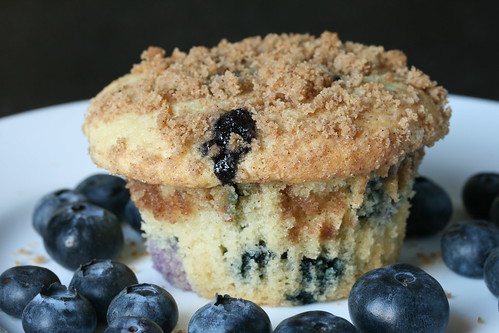
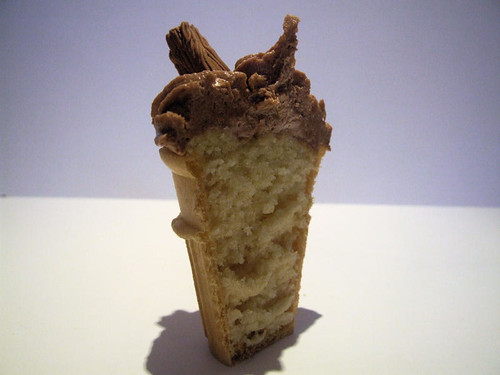
The finish line


1/2 cup butter, softened
1 cup white sugar
2 eggs
1 teaspoon vanilla extract
1 3/4 cups all-purpose flour
2 1/2 teaspoons baking powder
1/4 teaspoon salt
2/3 cup milk
24 flat bottomed ice cream cones

Frosting:
Important notice, read the end of the post for frosting info - this recipe is better if made ahead!
1/4 cup butter, melted
3/4 cup unsweetened cocoa powder
1/3 cup milk
1 teaspoon vanilla extract
3 cups confectioners sugar


Now here's the thing - I love making homemade cakes and such, but for this recipe, using a box mix recipe is actually nicer. If you could make the cones yourself - something I have not dared to try yet, it would probably be superior, but there's something about a processed item like ice cream cones with a homemade cupcake recipe that just seems like a weird mix to me. Still, this is a yummy cupcake recipe, so I still endorse it! But don't feel guilty about using box mix here. It's fine. 
  
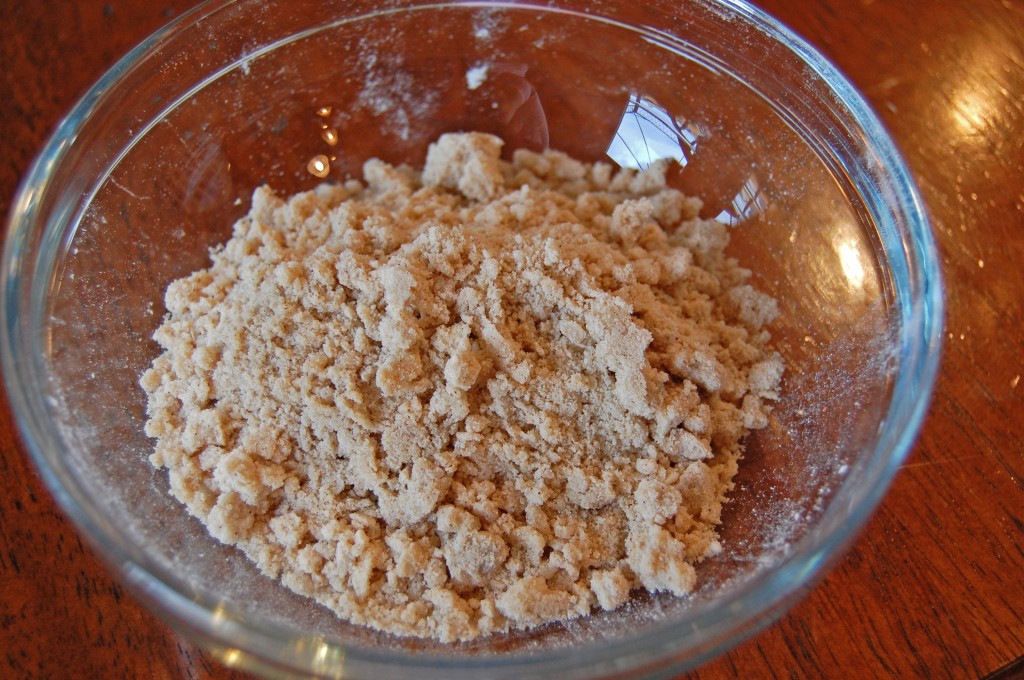
 Cream butter and sugar together in a bowl. Beat in eggs and mix in the vanilla. Combine flour, baking powder and salt in a small bowl.  Add milk to butter mixture in 2 parts alternately with flour mixture in 3 parts, beginning and ending with flour. 

Cake Batter

Fun part! Fill in the cones about 3/4 full leaving the batter 1/2 inch from top. Place filled cones on a baking tray. Bake in oven for about 15 to 20 minutes until an inserted toothpick comes out clean. 


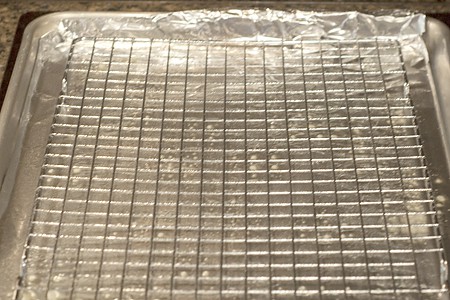
Sometimes I have difficult (being a tad clumsy) with balancing the cones on a baking sheet. Instead, you can take an egg carton and cut off the top portion where each egg would sit. The cones sheet fit in there nicely, and it will hold them steady throughout handling. Luckily, when baked, the cartons do not smoke or burn. 

Sorry...not my picture, as you can tell


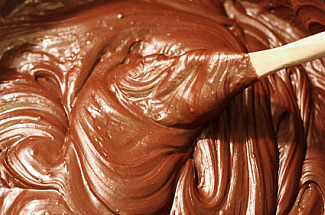
Here's the frosting deal - you mix everything together. You may wish to add more milk or sugar to alter the consistency. If you have the time, let it set, then stir it again. This will smooth things out as the recipe has a tendency to be lumpy if not given time to set.


Blueberry Crumb Muffins

I'll admit, I'm not a huge muffin person. I say breakfast is not only the most important meal of the day, but also the best meal of the day. You can eat anything for breakfast; half the time I eat pasta for breakfast. I love cupcakes. I don't want to eat a muffin when I could eat a cupcake. So, I don't like muffins that much. But I do like blueberry muffins. And I do like the crumby topping of banana crumb muffins. So I figured, why not take the only two redeeming qualities of muffins and make them into one muffin that I actually like better than cupcakes? I did. And here it is, just for you.

Yum
                                                                                 +

More yum
                                                                                 =

Yum to the high heavens

Oven at 375 degrees
Bake time about 20 minutes
Prep time about 20 minutes (especially if you have to run out and get blueberries)
total time? 45 minutes
Made about 11 muffins

1 1/2 cups all-purpose flour
1 teaspoon baking soda
1 teaspoon baking powder
1/2 teaspoon salt
1 1/2 cups blueberries


3/4 cup white sugar
1 egg
1/2 cup milk
1/3 cup butter, melted

I adore the smell of melted butter
 
Topping:
1/3 cup packed brown sugar
2 tablespoons all-purpose flour
1/8 teaspoon ground cinnamon
1 tablespoon butter
  
Prepare you're muffin tin for baking by setting in muffin liners or greasing each muffin maker. 

Mix together 1 1/2 cups flour, baking soda, baking powder and salt. In a separate bowl, beat together sugar, milk, egg and melted butter. Stir the wet mixture, along with blueberries, into the flour mixture just until moistened. Spoon batter into prepared muffin cups. 


In a small bowl, mix together brown sugar, 2 tablespoons flour and cinnamon. Cut in 1 tablespoon butter until mixture resembles coarse cornmeal. Sprinkle topping over muffins. 

Bake in preheated oven for 18 to 20 minutes, until a toothpick inserted into center of a muffin comes out clean.

Look at those happy little campers


Wednesday, June 27, 2012

Easy Bake Fries

I'm sorry to lead you here under false pretenses by calling these "Easy Bake Fries". If you're like me, a child of the '90's, hearing easy bake, or more particularly and easy bake oven, makes me picture one of these suckers:

No, these french fries are not going to be baked under that sweltering heat of a light bulb. These fries take about 5 minutes of preparation, and the work ends there.


Begin by slicing potatoes. I use about a small potato per person. Per potato you will need

1 tbls olive oil
1/2 tsp salt
1/2 tsp paprika
1/2 tsp garlic powder
1/2 tsp onion powder

Begin by slicing up your potatoes...


As you can see, I go for pretty slender slices. That's just a preferences- if you like wedges, you'll just want to adjust the baking time.

Mix them in a bowl with olive oil

Mix the spices together. Draw pretty designs.


 Add to the potato bowl and mix until everything is equally coated.
Your oven should be at 400 degrees.
I place the slices on a cooling rack and then place that on a baking sheet. This makes it so that you won't have to flip them half way through and they won't drip in your oven.


Bake for about 30 minutes. You may need longer depending on thickness. Let cool and then demolish.


Monday, June 25, 2012

Rainbow Cake

My family knows cakes. For my brother's 16th birthday we made 17 different cakes (one for each year plus one to grow on). After a certain point, it becomes hard to find a new cake. We made boston cream pie cake and ice cream cake. We made cupcakes in cones and zebra ice box cake. We had black forest chocolate cake and red velvet. It was incredibly. And yet, as ambitious as it was to make 17 different kinds of cake, we didn't touch the rainbow cake. No, the rainbow cake would not enter our repertoire for several years to come. 


Boston Creme
Cupcakes in Cones


Ice Cream Cake
Ice Box Cake

Black Forest


Red Velvet

 And I am so so sorry, but those pictures are NOT mine....I'll try to find a picture of all the cakes on the table (I remember we couldn't fit all of them in one shot!)

It turns out that despite it's beauty and apparent complexity, the rainbow cake is actually not that difficult! In fact, here's a nice, easy-to-manage, not too time consuming recipe for you all! Wahoo!

Okay...yes, this was taken from Martha Stewart's website

Oven Temp - 350
Cook Time - about 15 minutes per layer (but you can double up, so about 45 minutes total)
Preparation - about 25-30 minutes
Total Time - 1 hour 15 minutes

3 cups all-purpose flour
4 teaspoons baking powder
1/2 teaspoon salt
1 cup unsalted butter, room temperature
2 1/3 cups sugar
5 large egg whites, room temperature   (The yolks are great for Eggs Benedict!)
2 teaspoons pure vanilla extract
1 1/2 cups milk, room temperature
Red, yellow, and blue food coloring
Buttercream Frosting

First thing - let's separate those egg whites from the yolk. Crack an egg in half over a bowl, holding the yolk in one half. The yolk should stay in tact as long as it doesn't meet the jagged edges of the egg shell. Slide the yolk into the other half, and pass it back and forth. This should allow the white to become separated from the yolk. You  can store the yolks in a separate container. There are many recipes that require just the yolk, so you may want to hold unto them.

Good. We got that all cleared up.
 So, because there are six colors in the rainbow, you  need to make six colors. You can begin with  all six colors, but personally the sets sold by me are only red, yellow, green and blue. So you get to make your own colors! I mix the dyes and test the color on a paper towel.

Classic.

You will also need to bake each later separately. It would be great if you had 6 9-inch pans, but, you may be like me and only have 4. I just clean our two pans and use them again.

Mix the flour, baking powder and salt together and set aside.
Cream together butter and sugar. First, slowly add the egg whites and mix until completely combined. Add the vanilla. Slowly pour in the flour mixture and milk - beginning with the flour and ending with the milk.

Notice that it is lighter than most cake batters
 
Divide batter evenly between six medium bowls. Add as much dye as you see fit to each bowl (I love that part) and transfer each color to an individual cake pan.

A little gross - it looks like paint

 You can bake them now - at 350 for about 15 minutes each (test doneness via the "Toothpick Test").
Once they are done baking, let cool for 10 minutes on wire racks.
Trim the tops of the cakes to make level. Place four strips of parchment paper around perimeter of a serving plate (This will catch any excess frosting so the cake will look really clean at the end). Place the purple layer on the cake plate. Frost the cake very lightly, making sure a little frosting goes over the edges. Layer the blue cake on top and repeat through orange. Place the remaining red layer on top, bottom-side up. Gently sweep away any loose crumbs with a pastry brush.


 Finish the frosting process by smoothing over the rest of the layers. Refrigerate until set, about 30 minutes.

Garlic Butter for Everything

I have a soft spot for dishes that sound homey. Garlic butter makes me picture a goldeny wheat field.

Step into my mind
 But not just a wheat field. There's a little picnic table with a red plaid table cloth and a homey wife is serving her cute little kid and stoic husband some fresh baked bread. On the side there is some homemade jam and a little tub with a hand written label saying "Garlic Butter".
Yeah. Garlic Butter. It's all completely adorable. It's my backup plan if the whole library-mansion thing doesn't quite pan out.
See, garlic butter isn't just for bread (although it does make a mean garlic bread) - it can be used in a million places. Pasta becomes garlic pasta. Eggs become garlicy eggs. Steak becomes garlic steak. Okay...I guess that seems pretty obvious. BUT, cooking should never be restricted just because something has a common usage. New recipes are made by mixing new things - so use that garlic butter all over your refrigerator!

1 cup butter, softened
2 tablespoon minced garlic
1 tablespoon garlic salt
1 teaspoon Italian seasoning
1/2 teaspoon ground black pepper
1/4 teaspoon ground paprika
Of course, Parmesan Cheese

Mix the butter, garlic, garlic salt, Italian seasoning, pepper and paprika together.


 So, that's the basic recipe. Here's a few recommendations.

Take a baguette and cut it diagonally.

Like so
Turn your oven up all the way to broil (500 degrees). Pop the bread in for about 3 minutes. Take it out and spread the garlic butter on them. You may wish to add cheese. I recommend parmesan or blue cheese. Put bake in oven until the bread is a golden brown.


Another simple recipe is melting the butter over pasta and sprinkling with cheese. Very simple and very yummy.

I will try to update this post to include other uses for garlic butter. If you think of any yourself feel free to comment and I'll add them!

Saturday, June 16, 2012

Peanut Butter Cup Cookies

This remains a family classic. Few cookie recipes combine chocolate and peanut butter in the perfect ratio as well as this one does. These cookies are not the type that just have a peanut butter cup on top - no, these cookies ARE peanut butter cups. 

Mmmm, Reese's

In between Reese's and cookie
See the though process?!

So, you see the likeness. Of course, these are a bit more time consuming than regular cookies, but the hit the spot. These always seem like end of the school year cookies to me. Luckily, it IS the end of the school year! Yesterday was the last day of school, with finals happening monday and tuesday. Thank goodness for summer time. Unfortunately, the summer is the only thing separating me, and my classmates, from the college rush that will happen this fall. At least there's still some time to make cookies.

You will need:
1 1/2 cup flour
1/2 cup unsweetened cocoa powder
1/2 tsp baking soda
1 stick of butter, SOFTENED
1/2 cup sugar
1/2 cup brown sugar
1/2 and then 1/4 cup peanut butter
1 egg
1 tsp vanilla
3/4 and then 1/2 cup of powdered sugar

Prep time - 30-45 minutes
Bake time - 10 minutes per tray
Total Time - about an hour
Oven Temp - 350

First, I always prep by taking a bite of peanut butter. You've got to know the consistency of the ingredients you are working with. But seriously, I recommend scooping out the peanut butter you will need right now. It is easier to handle when it's not in the jar. Personally, I prefer smooth peanut butter for this. It makes a really nice texture with the powdered sugar.
Now, in a small bowl, combine the flour, cocoa powder and baking soda. Mix and set aside.


Separately, mix the softened butter with sugar, brown sugar and 1/4 of the peanut butter. Beat in the egg and vanilla. Slowly add in the dry ingredients, mixing until just combined.
This is your chocolate dough.  Split it into about 30 equal parts and roll them into balls.
Next mix the powdered  sugar with the remaining 1/2 cup of peanut butter.


 It may be too crumbly - add more peanut heaven butter until it holds together and is easy to roll, without being sticky.


This is the filling. Roll the peanut butter into 30 balls.

 
 Flatten out the chocolate balls, and place one peanut butter ball inside of the chocolate. Fold the chocolate around the edges and seal. Flatten the ball.


An easy way to flatten the ball is to take a cup and coat the bottom with sugar and use that to flatten it.


To add an extra zing, I put a little bit of salt into the sugar, to give the cookies that desired salty & sweet contrast.
Bake those suckers at 350 for about 8 minutes each, until they begin to crack. The peanut butter middles will, and should, be soft.


Wednesday, June 13, 2012

Summertime Spaghetti

An old family favorite originating from the Magic Spoon Cookbook but with several alterations to make it our own. When I was young I was always resistant to eating tomatoes, but my sister always coaxed me into eating them through this.
In case you haven't realized, I am a pasta FANATIC. It's not unusual for me to eat pasta three meals a day. While not the most healthy of my habits, I justify it by running 40 miles a week. That's also my excuse for eating copious amounts of chocolate on a daily basis.
This dish is ideal for summer. It does not have to be heated to be enjoyed. Simple flavors, delicious with fresh garden tomatoes and basil. 


Fresh fresh fresh
 
For this recipe you'll want:
1 lb of pasta
2 cloves of garlic
1/3 cup olive oil
1 fresh basket of cherry tomatoes
8 fresh basil leaves, chopped finely
grated parmesan cheese


Too simple and easy to not make.


When the pasta is just boiled and still hot, mix it with the olive oil. Slice the tomatoes in half and mix with minced garlic and basil. When ready to eat, top with parmesan cheese.

Monday, June 11, 2012

Anchovy and Arugula

There are some strange foods out there. I think the one that stands out most to me is the Reuben Sandwich. What is a Reuben?


It's corned beef. It's sauerkraut. It's Swiss cheese. It's thousand island dressing. On rye bread. Let me just say that I don't like corned beef or sauerkraut. I also don't like Swiss cheese. I hate the idea of putting dressing on a sandwich. Oh, and rye bread is one of the six foods that I hate.
But I like a Reuben sandwich. I don't know how and I don't know why, but Reuben gets me. Maybe it's because he's the underdog, fighting against the food outside to win my affection. Maybe it's because sometimes when things are so repulsive they become good. Or maybe it's just a fluke of nature. Whatever it is, sometimes when you mix such gross things together, they come out good.
Lots of people don't like anchovies. But this is good. The flavor of the fish is so mellow you hardly notice it.

2 tablespoons extra virgin olive oil
4 large garlic cloves, peeled and slivered
4 oz of anchovy filets (About 16 filets) (and it's good if they are packed in olive oil!)
1 lb linguine or other long pasta
2 cups arugula, washed, dried and chopped
Red pepper flakes
Salt and pepper

First thing - set your pasta water boiling. You will end up needing about a cup of the pasta water later on, so it's good if you make the pasta the day of.
In a large skillet (you'll be pouring the pasta into here at the end) heat up the olive oil from the anchovies. If they did not come in that for whatever reason, use 2 tablespoons of olive oil. Heat up at medium heat for a minute. Add the garlic and the anchovies.
A little note - I like more anchovies personally, you may wish to use less that 4 ounces.

I'll admit I was a tad confused to see that these anchovies came with "Added Salt"

Anyways, wait until the garlic is sizzling and the anchovies are broken up. Turn the burner down to low. Add the pasta and arugula and enough water to make a sauce at your desired thickness.

 Mmmmmm....


 Toss and turn on medium for one minute. Add salt and pepper to taste and viola! You are done!


At the end, I always like to add a little Parmesan cheese on top!