Sunday, April 28, 2013

Slow-Cooker Chicken Teriyaki

Happy Sunday! What a gorgeous day out here. Perfect temperature, perfect sun level, perfect day to be outside! So, rather than whip up something labor intensive and time consuming I thought it was yet another great day to use the crock pot! Few things are harder to resist than classic chicken teriyaki. This recipe is so easy and so quick there's no reason that you shouldn't be making it right now.
Today I made the sauce, put everything in the crockpot and then went outside. I spent two hours frolicking around with zebra finch and hedgehog handy before returning to a scrumptious lunch


Beautiful.
Look at the way the sesame seeds cling to the succulent chicken. The way the pasta twirls around the meat. The way the paprika adds the finishing touches... Oh la la.


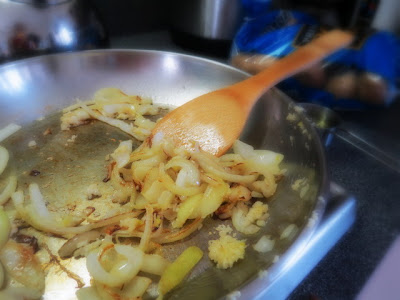
Ideal shape for a Bloomin' Onion
2.5 pound boneless, skinless chicken breasts
1 cup honey
1/2 cup soy sauce
4 tablespoons diced onion
4 tablespoons ketchup
2 tablespoon canola oil
2 cloves garlic, minced
1/2 teaspoon red pepper flakes
4 tsp cornstarch dissolved in 6 tbls water
Sesame seeds

Season both sides of chicken with lightly with salt and pepper, put into crock pot. In a small bowl, combine honey, soy sauce, onion, ketchup, oil, garlic and pepper flakes.


Pour over chicken.

There's no way to make chicken photogenic

 Cook on low for 3-4 hours or on high 1 1/2 – 2 1/2 hours, or just until chicken is cooked through.
Remove chicken from crock pot, leave sauce. Dissolve 4 teaspoons of cornstarch in 6 tablespoons of water and pour into crock pot. Stir to combine with sauce.
Replace lid and cook sauce on high for ten more minutes or until slightly thickened.
Cut chicken into bite size pieces, then return to pot and toss with sauce before serving.


Sprinkle with sesame seeds and serve over rice or noodles.

Sunday, April 21, 2013

Quickie: Chocolatey Pretzels

With the leftover M&M's from the best M&M cookies I decided it was time to create those delicious little pretzels with chocolate on them that always seem to be present at bakesales. For this you only need three ingredients and 5 minutes.

Oven Temp: 350 F
Prep Time: 3 minutes
Bake Time: 2 minutes
Ready-In: 5 minutes

Square or circular pretzels (I bought some circular ones sandwiched with peanut butter)
chocolate kisses, or flat chocolate discs
M&M's


Preheat oven. On a baking sheet, place pretzels with a kiss on top. Bake for about 2 minutes, until chocolate is melted. Press an M&M into the top. Let cool. Then consume.

Better Than Store- or Homemade M&M Cookies

I've been reading a lot of Harry Potter lately. Or, I suppose I ought to say re-reading. No....that's still not right. Something along the lines of re-re-re-re-re-re-re-re-re-re-reading. Yeah. Prior to the second part of the seventh movie coming out, I reread the entire series to get my head in the game. However, once I saw the movie, I knew I'd have to take a long time off of reading the books- both to mourn the final end and to give myself a little time to forget some of the details in the books so that when I did inevitably go back and read them again, I'd be able to discover a few new levels of magic. Luckily, I have a terrible terrible memory, so the anticipated 5 years of no Harry Potter became less than 2 years! Woohoo! One has very few occasions to enjoy a poor memory, but this is surely one of them.
Anyways, this seemingly has very little to do with this weeks recipe. And, indeed, that is true. However, I am on school break this week so that has been part of what has been occupying my time. Now, the reason this ties in to the cookies is because I spent some time sorting the m&m's by color. It's one of those strange things I really enjoy doing. I like sorting coins and things by color. You're probably thinking, oh she's just a little OCD. No. I'm not. I am the youngest of four and I am the sole reason my house is messy. I once went three years without cleaning my room and it was so messy there were drifts of junk. Three foot tall heaps. But I'm not like that anymore! While still messy, I no longer am on the National Hoarder List. 
And now you're dying to know - what does being a non-OCD pleasure sorter and Harry Potter fan have to do with cookies?
Well. When I started sorting the m&m's by color, I said outloud to our zebra finch, Billie "Let the sorting begin!" and she began squawking excitedly. So. There you have it.


Prep Time: 10 minutes
Chill Time: 30-90 minutes
Bake Time: 10 minutes
Ready In: 50-110 minutes

1 cup brown sugar
1/2 cup white sugar
1 cup butter, softened
2 eggs, at room temp
1 1/2 teaspoons vanilla extract
2 1/2 cups all-purpose flour
1 teaspoon baking soda
1 bag of m&m's


As always, for best results of  cookies, you want the ingredients to all be at room temperature. However, I know sometimes you don't have much warning. So, I would recommend taking the eggs out as soon as you begin and give them as much time to warm as possible. For the butter, I'll just chop it up (into about tablespoon sized hunks) and microwave for 20 seconds to soften it. 


That seems to do that job pretty well, especially if you take the time to put the dough in the fridge prior to baking.

So, in a large bowl, mix sugars and butter until smooth. 
Stir in eggs and vanilla and mix thoroughly. Add flour, and baking soda to creamed mixture.  
Blend well. 
You can approach the m&m's one of two ways. You can add 3/4 cup of M&M candies right now if you want just random patterns or you can wait until after the dough is chilled to make specific designs. I wanted to write things out on the top of mine, so I did the second way. Either way, chill the dough for 30-90 minutes. Longer is always better, but if you're in a rush, you do what you have to do. 


Preheat oven to 350. Lightly grease your baking sheets. For the random m&m method, drop dough by teaspoonful onto cookie sheet. Slightly push a few candies on top of each dough ball with remaining candies. For designed method, roll dough into balls and flatten out. Press m&m's into desired formation.  
 

Bake at 350 degrees F for 9 to 11 minutes until very lightly golden at the edges.
 

Monday, April 15, 2013

Mini Mushroom, Arugula and Onion Tarts

 Wooohoooo! School break! My last April break of high school. It's time to do a serious number on my to-do list: Watch Shrek, win a game of chess, let the hedgehog experience the outside world under close supervision, etc. The normal teen stuff. Well, I woke up this morning all excited about this sandwich I envisioned. Picture this:
A pad of butter sizzling in a frying pan, filling the kitchen with the sultry aroma of the start to a great sammich. Gently grating some cheddar cheese, to sprinkle liberally into the pan, melting ever so perfectly. The rough squeeze as you pull together the sides of a garlic pressing, the tiny pieces of garlic landing so perfectly in the pan. Popping two slices of whole grain bread in the toaster before moving to begin slicing up some grilled chicken. Painstakingly choosing the best pieces of arugula, before the toast pops up, you delicately butter one piece.

Arugula: A Zebra Finch's Fancy


Now, watching the cheese smoothly glide unto the bread and the hand-picked arugula landing on top. Finally, the crescendo, you place the chicken and upper piece on toast and give it a finally squeeze. Yum. Sadly, not photogenic whatsoever. I tried. My very best. Oh well.
So, it was time to try again. My dad, good ol' Papa Zim, said he'd been wanting to try something culinarily new with mushrooms. I love me a good pie. I knew we could find a compromise.


Oven Temp: 400 F
Prep Time: 20  minutes
Bake Time: 50 minutes
Ready In: 1 hr 15 minutes

1 cup fat free cottage cheese
1 medium yellow onion
1/2 pound mushrooms (8 ounces), chopped into small pieces
1 egg

2 cups arugula
4 cloves garlic
 2 tsp oregeno
2 tsp thyme
2 tsp rosemary
2 tbls canola or olive oil (for frying)
salt and pepper

Crust
1 1/4 cup flour
1 tbls apple cider vinegar
3 tbls water
1/2 cup butter (1 stick) cold and cubed
red pepper flakes

You'll want to have the crust all ready to go in the fridge as you began to prepare the filling. 
So, cut butter into the flour until it forms a crumbly mix. Keeping in mind that an over worked pie crust is less fluffy, mix water and vinegar into crumbles and work with hands until just combined.


If you want a little flavor boost, stir in some pepper flakes. Seran wrap and place in fridge.


Begin sauteing onions in a large frying pan with the oil over medium heat. When they begin to brown mix in garlic. Mix in mushrooms.


Sizzle until most of the moisture is gone from mushrooms. You'll notice that the pan will soon have more water in it from the mushrooms. Good job!


Once the mushrooms have shrunken, stir in arugula and stir until arugula wilts a little, about 30 seconds to a minute. Remove from heat.


Place cottage cheese in a bowl, stir in the egg. Mix in vegetables. Sprinkle in spices liberally.

Remove dough from fridge. Grease some a muffin tin really well (for the tiniest pies) or a cake pan (for medium) or an ordinary pie pan (large). 


Preheat oven to 400. Press pie into respective pan(s). If you want, sprinkle with red pepper flakes for a flavor boost! Bake the crust until lightly golden (about 10 minutes for smallest, or 15 for the bigger ones). Remove, let cool. If needed, gently press down the crust if it became too puffy during the baking. Pour in the filling.


 Bake for about 40 minutes at 400.


Ta-da! A petite pie!

Sunday, April 7, 2013

Crispy Orange Chicken

Today's Topic of Discussion: Trader Joe's. 
I can wander those healthy aisles for hours on end. Every time my papa and I go shopping there I always try something new, and have yet to run out of things. I know a common complaint of TJ's is that from time to time they will discontinue an item. Let's take a moment of silence for some classic - the cheese and veggie burrito, milk chocolate butter biscuit, rolled chicken tacos and numerous others which have been sacrificed for that sake of new products. See, the thing is, Joe promises to be continually creative by releasing a handful of new products every week. While that is absolutely fabulous, it means eliminating a few products, too. It's a give and take. You can never risk depending too heavily on one product, or becoming too enamored for fear it will be the next victim. TJ's knows how to keep us coming back.

 
Why you discontinue my favorite things?!?!?!?!

 Anyways. Trader Joe's makes this incredible chicken that has thus far stood the test of time. It's been in stores as long as I've been going. Orange Chicken. Yum. Perfectly crispy when baked with the right amount of sauce, so you have enough to shmear over some rice or pasta. It's pre-cooked, so I always remove the smallest pieces while I'm waiting for the rest to bake and nom on those. I've been in love with the orange chicken for a while now, but I recently started paying more attention to having a balanced, healthy diet.  Now, I bake almost weekly, so I'm not all too mindful of sweets (especially with Easter!). However, I've become increasingly interested in baking things instead of frying. Also, I found Panko crumbs. So. Lots of fun in the kitchen. 


Oven Temp: 450 F
Bake Time: ~15 minutes
Prep Time: 20 minutes (+ 2 hr for marinating)
Ready-In: 3 hours

   
1 1/2 cups water 
1/3 cup orange juice 


1/3 cup lemon juice  
1/3 cup rice vinegar 
2 tablespoons soy sauce 
1 tablespoon grated orange zest 
1 cup packed brown sugar  
1 teaspoon minced fresh ginger root
1/2 teaspoon minced garlic 
3 tablespoons cornstarch 

3 chicken breasts, cut into 1/4 - 1/2 inch cubes
1 tbls salt
1 tsp pepper
1 1/2 cup panko crumbs

Pour water, orange juice, lemon juice, rice vinegar, and soy sauce into a saucepan on medium-high heat. 


Stir in the orange zest, brown sugar, ginger, garlic, chopped onion, and red pepper flakes. Bring to a boil for one minute, then remove from thy heat and leave it alone until it cools for about 15 minutes. 


Once it has good and properly cooled, pour 3/4 to 1 cup into a resealable plastic bag. Save the rest of the sauce for later. Insert chicken into the bag, seal and refrigerate for at least 2 hours. 

 
Raw chicken; never photogenic

 
Preheat oven to 450 F.
In another resealable plastic bag, mix the panko crumbs, salt, and pepper. Add the marinated chicken pieces, seal the bag, and shake like a maraca to coat.
Lay a wired cooling rack over a baking sheet. Spray with cooking oil. Place now-pankoed chicken on the rack. Bake for about 15 minutes, until cooked all the way through.


Recommended - rotate sheet half way through for even cooking.
Let cool. In the meantime, gently heat extra sauce, stir in cornstarch to thicken. Immediately before serving, pour sauce over chicken (or serve as a side dipping sauce).